pi-qq-integration
QQ integration for pi — control pi from QQ | pi QQ 集成 — 在 QQ 中操控 pi
Package details
Install pi-qq-integration from npm and Pi will load the resources declared by the package manifest.
$ pi install npm:pi-qq-integration- Package
pi-qq-integration- Version
0.4.3- Published
- Jul 31, 2026
- Downloads
- 857/mo · 560/wk
- Author
- nu11dev
- License
- MIT
- Types
- extension
- Size
- 844.6 KB
- Dependencies
- 1 dependency · 1 peer
Pi manifest JSON
{
  "extensions": [
    "./dist/index.js"
  ],
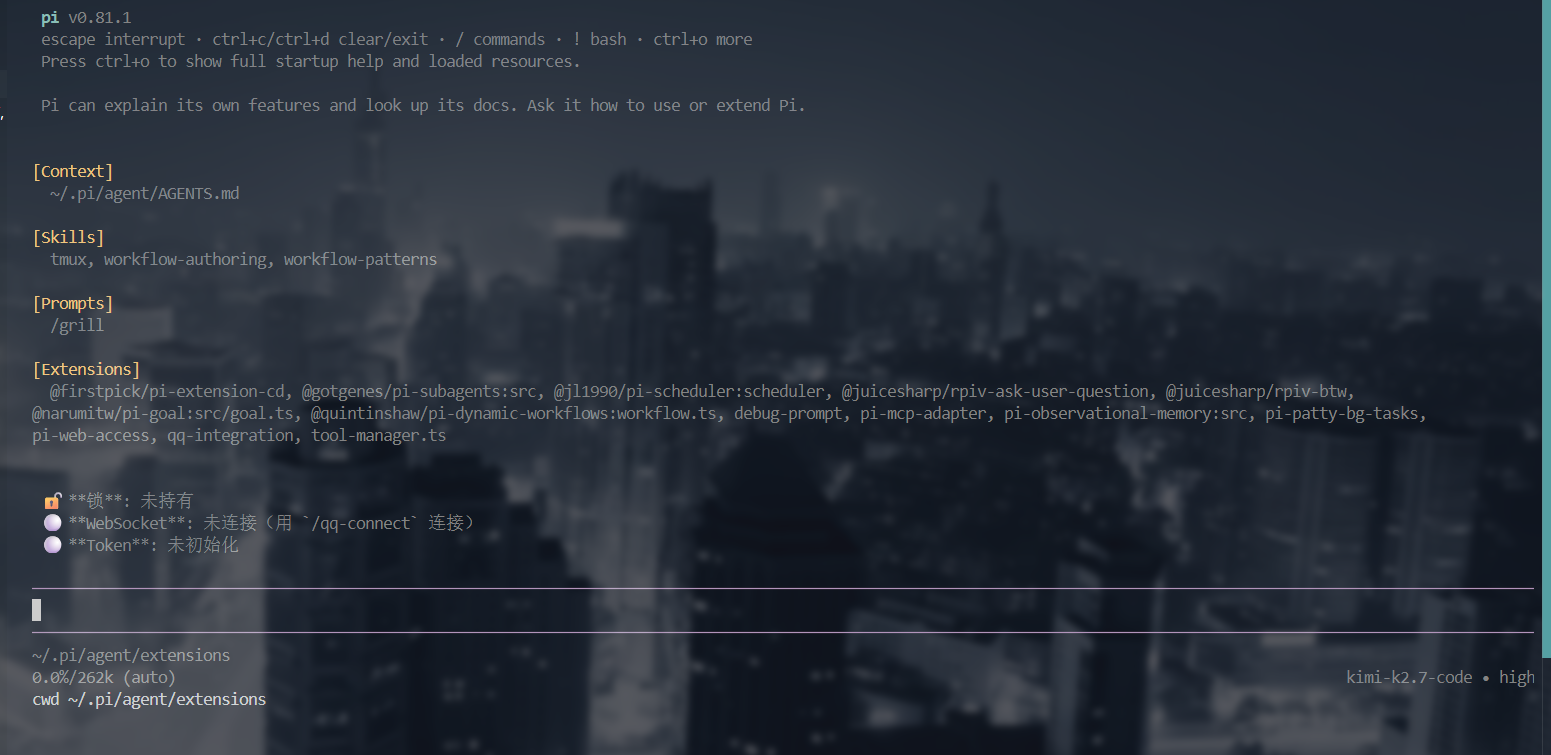
  "image": "https://raw.githubusercontent.com/Star-233/pi-qq-integration/master/screenshot.png"
}
Security note
Pi packages can execute code and influence agent behavior. Review the source before installing third-party packages.
README
pi-qq-integration
Control pi from QQ. A pi extension that connects your pi coding agent to QQ via the official QQ Bot API. Send prompts, browse sessions, view history, and toggle forwarding — all from a QQ chat window.
Install
pi install npm:pi-qq-integration
Quick Start
1. Register a QQ Bot
Create a bot application on the QQ Open Platform to obtain your AppID and AppSecret.
2. Create a config file
# ~/.pi/agent/qq-integration-config.json
{
  "appId": "your-app-id",
  "appSecret": "your-app-secret"
}
3. Start pi
pi
The extension loads and automatically connects to QQ Bot by default. To disable auto-connect, add "autoConnect": false to the config file and use /qq-connect manually. Send a message to your bot in QQ — it'll be forwarded to pi as a prompt.
Configuration
Config file path: ~/.pi/agent/qq-integration-config.json
Top-level fields
| Field | Type | Required | Default | Description |
|---|---|---|---|---|
appId |
string | ✅ | — | QQ Bot application AppID |
appSecret |
string | ✅ | — | QQ Bot application AppSecret (sensitive — never commit to git) |
instanceId |
string | ❌ | hostname-pid |
Unique ID for this pi instance (used in multi-instance registry) |
role |
"auto" | "leader" | "follower" |
❌ | "auto" |
Multi-instance role: auto = file-lock election; leader = force QQ connection holder; follower = connect via IPC to leader |
autoConnect |
boolean | ❌ | true |
Auto-connect QQ Bot on pi startup; set false to require manual /qq-connect |
settings field (forwarding options)
| Field | Type | Default | Description |
|---|---|---|---|
forwardDesktopMessages |
boolean | false |
Forward messages typed in the pi terminal to QQ |
forwardToolCalls |
boolean | false |
Forward tool call details to QQ (mutually exclusive with lastMessageOnly) |
lastMessageOnly |
boolean | false |
Only forward the final assistant reply per agent run (mutually exclusive with forwardToolCalls) |
defaultSession |
object | undefined | undefined |
Default QQ session target for desktop/tool forwarding; set via /qq-target or QQ #target |
settingsfields can be configured statically in the config file or changed dynamically in QQ using#settingscommands (see QQ Commands below). Settings are persisted to the config file.
Full example
{
  "appId": "your-app-id",
  "appSecret": "your-app-secret",
  "autoConnect": true,
  "role": "auto",
  "settings": {
    "forwardDesktopMessages": false,
    "forwardToolCalls": false,
    "lastMessageOnly": false
  }
}
Environment variables
| Variable | Description |
|---|---|
QQ_INTEGRATION_DATA_DIR |
Override data directory (default: ~/.pi/agent) |
QQ_API_BASE |
Override QQ API base URL (default: https://api.sgroup.qq.com) |
QQ_TOKEN_API |
Override Token API endpoint (default: https://bots.qq.com/app/getAppAccessToken) |
Multi-instance
When running multiple pi instances simultaneously, a file-lock elects a single leader to hold the QQ WebSocket connection. Other instances become followers and delegate QQ send/receive to the leader via local Unix socket IPC.
role: "auto"(default) — first instance to acquire the lock becomes leader; rest become followers.role: "leader"/"follower"— force a specific role.instanceId— usually unnecessary; set only for fixed IDs in logs/registry.
Architecture
QQ User
  │
  ├─ Send message → QQ Bot Server → WebSocket
  │                                      │
  │                      ┌───────────────▼───────────────┐
  │                      │  pi-qq-integration extension   │
  │                      │                                │
  │                      │  ws-client.ts                  │
  │                      │    ↕ WebSocket (long-lived)    │
  │                      │  command-handler.ts            │
  │                      │    ↕ #cmd parsing              │
  │                      │  index.ts                      │
  │                      │    ↕ sendUserMessage           │
  │                      └───────────────┬───────────────┘
  │                                      │
  │                      ┌───────────────▼───────────────┐
  │                      │        pi engine               │
  │                      │   processes prompt & replies   │
  │                      └───────────────┬───────────────┘
  │                                      │
  └─────── REST API ←──── reply content
Two independent channels:
- WebSocket — receives QQ messages (long-lived connection with heartbeat and auto-reconnect)
- REST API — sends replies to QQ (
POST /v2/users/{openid}/messages)
pi Slash Commands
Commands used in the pi terminal:
| Command | Description |
|---|---|
/qq-connect |
Manually connect QQ Bot |
/qq-disconnect |
Disconnect QQ Bot |
/qq-status |
Connection overview (lock, WebSocket, Token) |
/qq-diagnose |
Detailed diagnostics (session_id, heartbeat, reconnect count, etc.) |
/qq-logs |
View last 30 log entries |
/qq-logs-path |
Show log file path |
/qq-logs-clear |
Clear log file |
/qq-target |
Set/view default QQ forwarding target |
QQ Commands
Messages sent in QQ that start with # are treated as commands. Anything else is forwarded to pi as a prompt.
| Command | Description |
|---|---|
#help |
Show help |
#sessions |
List all pi sessions |
#resume <index/name> |
Switch to a session (operates in terminal) |
#new |
Create a new session (operates in terminal) |
#history [N] |
View last N messages in current session (default: 5) |
#clear |
Compact current session (operates in terminal) |
#target |
Set current QQ conversation as default forwarding target |
#settings |
View/modify forwarding settings |
#settings examples
You: #settings
Bot: ⚙️ QQ Bot Settings
     | Option | Status | Description |
     | forwardMessages | ❌ Off | Forward desktop messages to QQ |
     | forwardTools | ✅ On | Forward tool calls to QQ |
     | lastMessageOnly | ❌ Off | Only forward final assistant reply |

You: #settings forwardTools on
Bot: ✅ Tool call forwarding enabled

You: #settings lastMessageOnly on
Bot: ✅ Only forward last reply enabled; forwardTools auto-disabled.
Desktop message forwarding
When forwardDesktopMessages is enabled, messages typed in the pi terminal are forwarded to QQ. The target is selected by priority:
- The most recent QQ message's source session
- The manually set default target (
/qq-targetor QQ#target)
# Set default target in pi terminal
/qq-target c2c <user-openid>      # Private chat
/qq-target group <group-openid>   # Group chat
/qq-target                        # View current target
/qq-target clear                  # Clear

# Or in QQ: send #target to set current conversation as target
File structure
pi-qq-integration/
├── index.ts              # Entry: init, events, slash commands
├── constants.ts          # Centralized constants (paths, URLs, timeouts)
├── config.ts             # Config file read/write (atomic writes)
├── auth.ts               # QQ Bot access token management + auto-refresh
├── lock.ts               # File lock (O_EXCL atomic creation, multi-instance)
├── ws-client.ts          # WebSocket client (connect, auth, heartbeat, reconnect)
├── api-client.ts         # REST API client (send messages)
├── ipc.ts                # Unix socket IPC (leader-follower delegation)
├── registry.ts           # Instance registry (atomic writes)
├── session-manager.ts    # Pi session browser
├── command-handler.ts    # QQ #command parser
├── logger.ts             # File logger with rotation
├── types.ts              # Type definitions
└── package.json
Multi-instance details
~/.pi/agent/
├── qq-integration.lock          # File lock (O_EXCL atomic creation)
│   ├── PID
│   ├── startedAt
│   └── heartbeatAt (every 30s)
└── qq-integration/
    ├── registry.json             # Instance registry (atomic write)
    └── instances/
        └── <pid>.sock            # IPC Unix socket (leader)
- First pi instance acquires the lock → becomes leader → connects QQ Bot
- Subsequent instances detect the lock → become followers → connect to leader via IPC
- If the leader crashes, its PID becomes invalid → next instance takes over the lock
Logging
All debug logs are written to:
~/.pi/agent/qq-integration.log
Use /qq-logs in pi to view the last 30 entries, or /qq-logs-path for the file path. Log files rotate at 5 MB.
Notes
- Token security — Access tokens expire in ~2 hours and are auto-refreshed. After 3 consecutive refresh failures, the extension disconnects and notifies the user.
- Message rate limits — QQ Bot proactive messages are limited to 4 per user/group per month. Passive replies have more relaxed limits.
- Session management — Session switching (
/new,/resume) must be done in the pi terminal. - Settings persistence —
#settingschanges are saved toqq-integration-config.jsonand survive/reload. - Group messages — Only @-bot messages are received (
GROUP_AT_MESSAGE_CREATE). - Config file — Contains AppSecret. Never commit it to git.
Development
cd ~/.pi/agent/extensions/pi-qq-integration
npm install          # Install dependencies
npm run build        # Compile TypeScript
npm run typecheck    # Type check only
# Edit code, then /reload in pi to hot-reload
pi-qq-integration — 中文版
在 QQ 中操控 pi。安装此扩展后,pi 启动时会自动加载扩展并默认自动连接 QQ Bot(可在配置中关闭)。连接后即可通过 QQ 向 pi 发消息、查看 session 列表、浏览历史对话;也可随时用 /qq-connect、/qq-disconnect 手动控制连接。
安装
pi install npm:pi-qq-integration
快速开始
1. 注册 QQ Bot
在 QQ 开放平台 创建一个机器人应用,获取 AppID 和 AppSecret。
2. 创建配置文件
# ~/.pi/agent/qq-integration-config.json
{
  "appId": "你的 AppID",
  "appSecret": "你的 AppSecret"
}
3. 启动 pi
pi
扩展加载后会自动连接 QQ Bot(默认行为)。如需关闭自动连接,在配置文件加 "autoConnect": false 后重启 pi,再用 /qq-connect 手动连接;断开用 /qq-disconnect。
现在在 QQ 中给机器人发消息,就能和 pi 对话了。
配置项(qq-integration-config.json)
配置文件路径:~/.pi/agent/qq-integration-config.json(位于 pi 的 agent 数据目录,与扩展代码目录无关)。
顶层字段
| 字段 | 类型 | 必填 | 默认值 | 说明 |
|---|---|---|---|---|
appId |
string | ✅ | — | QQ 开放平台机器人应用的 AppID |
appSecret |
string | ✅ | — | QQ 开放平台机器人应用的 AppSecret(敏感,勿提交 git) |
instanceId |
string | ❌ | hostname-pid |
多实例下本实例的唯一 ID |
role |
"auto" | "leader" | "follower" |
❌ | "auto" |
多实例角色:auto 由文件锁自动选举;leader 强制持有 QQ 连接;follower 强制经 IPC 接入 leader |
autoConnect |
boolean | ❌ | true |
pi 启动时是否自动连接 QQ Bot;设为 false 则需手动 /qq-connect |
settings 字段(转发设置)
| 字段 | 类型 | 默认值 | 说明 |
|---|---|---|---|
forwardDesktopMessages |
boolean | false |
桌面端(pi 终端)输入的消息是否转发到 QQ |
forwardToolCalls |
boolean | false |
工具调用是否转发到 QQ(与 lastMessageOnly 互斥) |
lastMessageOnly |
boolean | false |
只转发整次 agent 运行的最后一条 assistant 回复(与 forwardToolCalls 互斥) |
defaultSession |
object | undefined | undefined |
默认 QQ 转发目标;由 /qq-target 或 QQ 内 #target 写入 |
settings内的字段既可在配置文件里静态写死,也可在 QQ 内用#settings命令动态调整并持久化。#settings命令对前两个开关使用了简写别名:forwardMessages对应forwardDesktopMessages,forwardTools对应forwardToolCalls。
完整示例
{
  "appId": "你的 AppID",
  "appSecret": "你的 AppSecret",
  "autoConnect": true,
  "role": "auto",
  "settings": {
    "forwardDesktopMessages": false,
    "forwardToolCalls": false,
    "lastMessageOnly": false
  }
}
环境变量
| 变量 | 说明 |
|---|---|
QQ_INTEGRATION_DATA_DIR |
覆盖数据目录(默认 ~/.pi/agent) |
QQ_API_BASE |
覆盖 QQ API 域名(默认 https://api.sgroup.qq.com) |
QQ_TOKEN_API |
覆盖 Token API 地址(默认 https://bots.qq.com/app/getAppAccessToken) |
多实例
同时运行多个 pi 实例时,用文件锁选举唯一的 leader 持有 QQ 连接;其余实例作为 follower 经本地 Unix socket IPC 把 QQ 收发委托给 leader。
role: "auto"(默认):谁先抢到锁谁是 leader,其余自动成为 follower。role: "leader"/"follower":强制角色。instanceId:一般无需修改;仅在需要固定 ID 时设置。
架构
QQ 用户
  │
  ├─ 发消息 → QQ Bot 服务器 → WebSocket
  │                                │
  │                     ┌──────────▼──────────┐
  │                     │  pi-qq-integration  │
  │                     │  ws-client.ts       │
  │                     │    ↕ WebSocket      │
  │                     │  command-handler.ts │
  │                     │    ↕ #cmd 解析      │
  │                     │  index.ts           │
  │                     │    ↕ sendUserMessage│
  │                     └──────────┬──────────┘
  │                                │
  │                     ┌──────────▼──────────┐
  │                     │      pi 引擎         │
  │                     └──────────┬──────────┘
  │                                │
  └─────── REST API ←──── 回复内容
两个独立通道:
- WebSocket — 接收 QQ 消息(长连接,带心跳和断线重连)
- REST API — 发送回复到 QQ
pi Slash 命令
| 命令 | 说明 |
|---|---|
/qq-connect |
手动连接 QQ Bot |
/qq-disconnect |
断开 QQ Bot 连接 |
/qq-status |
查看连接状态概览(锁、WebSocket、Token) |
/qq-diagnose |
查看详细诊断信息 |
/qq-logs |
查看最近 30 条日志 |
/qq-logs-path |
查看日志文件路径 |
/qq-logs-clear |
清空日志文件 |
/qq-target |
设置/查看默认 QQ 转发目标 |
QQ 命令
在 QQ 中给机器人发送的消息,如果不以 # 开头,会直接作为 prompt 发给 pi。
| 命令 | 说明 |
|---|---|
#help |
显示帮助 |
#sessions |
列出所有 pi session |
#resume <序号/名称> |
切换到指定 session |
#new |
创建新 session |
#history [N] |
查看最近 N 条消息(默认 5) |
#clear |
压缩当前 session |
#target |
将当前 QQ 会话设为默认转发目标 |
#settings |
查看/修改转发设置 |
桌面端消息转发
开启桌面端转发(#settings forwardMessages on)后,桌面端输入的消息会同步转发到 QQ。目标按优先级选择:
- 最近一条 QQ 消息来源的会话
- 手动设置的默认目标(
/qq-target或 QQ#target)
/qq-target c2c <用户openid>        # 私聊
/qq-target group <群openid>        # 群聊
/qq-target                         # 查看当前目标
/qq-target clear                   # 清除
#settings 示例
你: #settings
Bot: ⚙️ QQ Bot 设置
     | 选项 | 状态 | 说明 |
     | forwardMessages | ❌ 关 | 桌面端消息转发到 QQ |
     | forwardTools | ✅ 开 | 工具调用转发到 QQ |
     | lastMessageOnly | ❌ 关 | 只转发最后一条回复 |

你: #settings forwardTools on
Bot: ✅ 工具调用转发已开启

你: #settings lastMessageOnly on
Bot: ✅ 只转发最后一条回复已开启;forwardTools 已自动关闭。
文件结构
pi-qq-integration/
├── index.ts              # 入口:初始化、事件、slash 命令
├── constants.ts          # 集中常量(路径、URL、超时值)
├── config.ts             # 配置文件读写(原子写入)
├── auth.ts               # Token 管理 + 自动刷新
├── lock.ts               # 文件锁(O_EXCL 原子创建)
├── ws-client.ts          # WebSocket 客户端
├── api-client.ts         # REST API 客户端
├── ipc.ts                # Unix socket IPC
├── registry.ts           # 实例注册表(原子写入)
├── session-manager.ts    # Session 浏览
├── command-handler.ts    # #命令解析
├── logger.ts             # 文件日志(自动轮转)
├── types.ts              # 类型定义
└── package.json
多实例细节
~/.pi/agent/
├── qq-integration.lock          # 文件锁(O_EXCL 原子创建)
│   ├── PID
│   ├── startedAt
│   └── heartbeatAt(每 30 秒更新)
└── qq-integration/
    ├── registry.json             # 实例注册表(原子写入)
    └── instances/
        └── <pid>.sock            # IPC Unix socket(leader)
- 第一个实例获取锁 → 成为 leader → 连接 QQ Bot
- 后续实例检测到锁 → 成为 follower → 通过 IPC 连接 leader
- leader 崩溃后 PID 失效 → 下一个实例自动接管
日志
所有调试日志写入 ~/.pi/agent/qq-integration.log。使用 /qq-logs 查看最近 30 条,/qq-logs-path 查看路径。日志文件达到 5 MB 自动截断。
注意事项
- Token 安全 — Token 有效期约 2 小时,自动刷新。连续 3 次刷新失败后自动断开并通知。
- 消息频率 — 主动消息每月每用户/群限 4 条,被动回复较宽松。
- Session 管理 — session 切换需在 pi 终端操作。
- 设置持久化 —
#settings变更保存到配置文件,/reload不丢失。 - 群聊消息 — 仅接收 @机器人的消息。
- 配置文件 — 含 AppSecret,勿提交 git。
开发
cd ~/.pi/agent/extensions/pi-qq-integration
npm install          # 安装依赖
npm run build        # 编译 TypeScript
npm run typecheck    # 仅类型检查
# 编辑代码后在 pi 中 /reload 热重载